Bassassins Posted May 28, 2014 Report Share Posted May 28, 2014 Living so close to Petrie now I knew we needed to have something on the water at the island. I had an old 14ft HARBERCRAFT aluminum boat that belonged to my grandfather brought up to the city for me to work on. It hadn't seen the water in almost 20 years so once we knew it floated I went to work on a plan to make it ours. NOW I will warn you all that this is FAR from a pro job on modifying this boat and my own plan after lots of reading. So everything I have done was from my own head and I can’t say that it will work for everyone BUT I can say that after a few days on the water we could not be happier – blown away really! After lots of reading I had seen many different upgrades done to a tin boat – I felt that a lot of the things done where a little overkill and added unnecessary weight by complicating the issue. Why not let the natural frameworks of the boat do all the work for you? Keep it simple? I started by sanding the old paint off the boat and the trailer – I read aluminum can be hard to paint so I followed some steps that would allow the paint to last longer but without a professional paint job I know it won’t last forever. I sanded, washed with soap and water and scrubbed with vinegar… all before I applied the primer. Once the primer had dried I applied professional high performance Tremclad – two coats were needed on all surfaces outside, inside and the trainer. Once that was all done I was able to add a clear coat for shine before the decals were put on. NOW to turn this bad boy into a bass boat!!! I had read so much about adding compartments by building framework etc., etc. – I thought to myself WHY not let the benches in the front do all the work for that? One big compartment will allow us to add a live well, maximizes storage and eliminates the added weight of the “structural” wood. So I pulled out a piece of drywall as its sheets are the same size as the plywood sheets but MUCH easier to cut. I took my measurements and went to work laying out a template with the drywall. Once the drywall template was created I cut it apart and used the pieces to draw out my plywood and cut my pieces. I screwed in a couple of pieces of 2X8 underneath for the added support under the doors – I felt that this made the flex point of the bigger door much smaller and ensured that the smaller door wouldn't fall through if stepped on. With the pieces cut I went to work carpeting them using a staple gun before attaching the finished pieces to the boat – I used indoor outdoor carpet with a low pill to avoid hooks continuously getting caught when laid down. Once all the pieces were carpeted I used self tapping screws to attach the deck to the inside of the boat. The big compartment I secured with a 24inch hinge and I used two smaller ones for the front. Final touches were a couple of handles – I grabbed some flat rope, doubled it over and attached two smaller screws from the inside of the door – this way there was no trip hazard. Two small closures were needed for the big door as it kicked once the hinge was added and didn't stay flush – all good now! This project was less than $300 to complete and with the addition of a few more toys – decals, Hummingbird fish finder, 55lb Minn Kota trolling motor and a 15hp Johnston – we are set! As I said before my first shot at one of these and once we were on the water I couldn't be happier with how she turned out. SOOO NOW that the project boat is complete our fishing has moved to a new level – you never know where you will see us next… BASSASSINS BABY!!! Tight Lines all… hope this mod gets your creative juices flowing – life is a lot more fun outside the box! See you on the water. Smooth Link to comment Share on other sites More sharing options...
can u fish Posted May 28, 2014 Report Share Posted May 28, 2014 Great job well done enjoy the boat. Link to comment Share on other sites More sharing options...
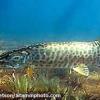
pairofgreenhorns Posted May 28, 2014 Report Share Posted May 28, 2014 sweet pic at the end there. looks awesome. well done on the mod!!! Link to comment Share on other sites More sharing options...
leaf4 Posted May 28, 2014 Report Share Posted May 28, 2014 nice work! gives me some ideas for my dad's 15 footer when he ends up passing it over lol Link to comment Share on other sites More sharing options...
alphaalpha Posted May 28, 2014 Report Share Posted May 28, 2014 Nicely done! And yes that pic at the end is really sweet! -AA Link to comment Share on other sites More sharing options...
landry Posted May 28, 2014 Report Share Posted May 28, 2014 I did the exact same thing to a 90 14' sea nymph about 12 years ago. It was fun and I loved the boat. I love boat mod or refurb threads. Nice work. There is a great used minn kota on the lake simcoe board right now I believe. 150 obo and it looks perfect for your boat. There is also a really well priced lowrance elite 5 listed there too. Landry Link to comment Share on other sites More sharing options...
Tim Mills Posted May 28, 2014 Report Share Posted May 28, 2014 Nice work, thanks for posting Link to comment Share on other sites More sharing options...
mattaw Posted May 28, 2014 Report Share Posted May 28, 2014 Great job. Thank you for posting that, the mod is really cool Link to comment Share on other sites More sharing options...
Bassassins Posted May 28, 2014 Author Report Share Posted May 28, 2014 Thanks guys - so happy that you liked it! I did the exact same thing to a 90 14' sea nymph about 12 years ago. It was fun and I loved the boat.I love boat mod or refurb threads.Nice work.There is a great used minn kota on the lake simcoe board right now I believe. 150 obo and it looks perfect for your boat. There is also a really well priced lowrance elite 5 listed there too.Landry Landry - thanks for the tips... ended up getting a nice little hummingbird unit and a 55lb minn kota for it... should be perfect!! Link to comment Share on other sites More sharing options...
davey buoy Posted May 28, 2014 Report Share Posted May 28, 2014 Job well done for someone just winging it!!!!Looks great! Link to comment Share on other sites More sharing options...
fishindude Posted May 28, 2014 Report Share Posted May 28, 2014 Looks great Robs! I hope to have a similar setup of my own one day, can't beat it bang for buck How do you find the stability with two people on the casting deck with the raised Centre of Gravity? Is it more tippy than you expected? Great job guys Link to comment Share on other sites More sharing options...
Steve Posted May 28, 2014 Report Share Posted May 28, 2014 flat bottom with raised decks...careful having both of ya standing on the bow.... a good hookset from one of ya would send the other flying.... i guess that means, you be the one setting the hooks, lol. great stuff! Link to comment Share on other sites More sharing options...
Bassassins Posted May 29, 2014 Author Report Share Posted May 29, 2014 Things I was a little worried about but we have been on the water twice with it now and it really isn't bad at all. You do need to be smart about moves you do make and for the picture we were both on the front (to try it out and for the shot) but we find ourselves usually one at the back running the trolling motor on or off the back bench (I was surprised how wide the back bench is and with the carpet its very safe) and the other spending most time running around the front. Like any boat or standing in a canoe or other things like that it is important to be smart about sudden movements but we aren't complaining. Link to comment Share on other sites More sharing options...
gino Posted May 29, 2014 Report Share Posted May 29, 2014 Dude! that looks awesome!!!! now you have to get us some more of those awesome pictures.. Enjoy your boat! Link to comment Share on other sites More sharing options...
aplumma Posted May 29, 2014 Report Share Posted May 29, 2014 well done looking good. A trick I learned from a counter top fabricator is instead of drywall use cardboard and tape to make the template. use a big piece for the main body then cut strips by placing them next to the edge and use a compass to trace the edge onto the loose piece of cardboard. Cut it out and then slide it to the edge and tape it onto place. You will have the perfect template for any shape you are covering in any product. Art Link to comment Share on other sites More sharing options...
Big Cliff Posted May 29, 2014 Report Share Posted May 29, 2014 Amazing job! Link to comment Share on other sites More sharing options...
Bassassins Posted May 29, 2014 Author Report Share Posted May 29, 2014 Thanks again guys - the feedback is awesome... well done looking good. A trick I learned from a counter top fabricator is instead of drywall use cardboard and tape to make the template. use a big piece for the main body then cut strips by placing them next to the edge and use a compass to trace the edge onto the loose piece of cardboard. Cut it out and then slide it to the edge and tape it onto place. You will have the perfect template for any shape you are covering in any product. Art Hey Art - this is also a great option, we had seen it before, I did have the drywall around the house so it was an easy option for me. Link to comment Share on other sites More sharing options...
Bassassins Posted May 29, 2014 Author Report Share Posted May 29, 2014 Thanks again guys - the feedback is awesome... well done looking good. A trick I learned from a counter top fabricator is instead of drywall use cardboard and tape to make the template. use a big piece for the main body then cut strips by placing them next to the edge and use a compass to trace the edge onto the loose piece of cardboard. Cut it out and then slide it to the edge and tape it onto place. You will have the perfect template for any shape you are covering in any product. Art Hey Art - this is also a great option, we had seen it before, I did have the drywall around the house so it was an easy option for me. Link to comment Share on other sites More sharing options...
EC1 Posted May 29, 2014 Report Share Posted May 29, 2014 Beauty boat dude! With one of these things, you'll be able to do everything a 40k rig can do, Best of luck for the bass season! Link to comment Share on other sites More sharing options...


Recommended Posts
Create an account or sign in to comment
You need to be a member in order to leave a comment
Create an account
Sign up for a new account in our community. It's easy!
Register a new accountSign in
Already have an account? Sign in here.
Sign In Now