Fishnwire Posted November 28, 2011 Report Share Posted November 28, 2011 (edited) I posted this on another site, one devoted strictly to ice fishing. I figured I'd post it here too. I hope you like it. All forms of feedback are encouraged. - This year, I decided to commit myself (and a couple of dollars) to finally building the hut I've always wanted. I've been in lots of huts and even worked on a couple with friends...I have a very definite idea of what I want and what I don't. It's going to be 12'x8', fully insulated, and will sleep two comfortably. It is destined for a section of the Lower X River called X Bay, about an hour away from where I live. I'll have to transport it there only once, it will spend summers on the shore of a friend's house located close by. I'm eager to share my progress and get feedback from others, so I'm starting this thread which I will update as need be. Here goes... The hut started with four 14 foot rough cut (actual dimension) 2"x10"'s. I picked them up from a local sawmill. The idea was to sister two together, creating two 14 foot 4"x10"'s. They'd be the runners. Then I'd notch them every two feet to a depth of 3.5" to accept 2x4 floor joists. We started doing this in my Father-in-law's front room of his house. We lined up all four on their edges and clamped them together, marked the spots for the joists and used a Skill saw cut notches, then drilled the holes for the bolts. Then we took two at a time, applied PL Premium construction adhesive to one side, clamped them back together and fastened them with 4.5" long 1/2 inch bolts...which are a little big I know, but I got them for free. Here's a "finished" one. At this point my Mother-in-law started to complain about the sawdust and woodchips. Frankly I'm surprised we got away with it as long as we did. My Father-in-law gave his son a call and (I have a great brother-in-law) he agreed to give us use of his garage. We packed up and headed over... We still had to deepen the notches, as the skill saw blade was not deep enough by about 3/4 inch. I used a hand saw and cut five or six notches in each notch, then we cleaned them up with a chisel. Then we cut the ends at an angle to form skis... And here we have two completed skis...glued and bolted with notches done and the ends cuts. They don't look like a big deal...but it was way more work and took much longer than I thought it would have, that's for sure. Here's a close up of an end and a notch... Tomorrow is another day...an update will follow. I welcome all comments, questions and criticisms. Edited February 21, 2012 by fishNwire Link to comment Share on other sites More sharing options...
Nipfisher Posted November 28, 2011 Report Share Posted November 28, 2011 Those are some solid runners. Great start to the hut process. If weight is not an issue then you are doing it right in my books. I pay a tilt-n-load tow truck to move mine twice each year. I store it for free at the end of my road so I can work on it durring the summer/fall. Link to comment Share on other sites More sharing options...
Stef Posted November 28, 2011 Report Share Posted November 28, 2011 Thats going to be a big, heavy but comfortable hut. Consider (if I guess your plans right) that you can traverse about 6" of snow before you start plowing in front of your hut when towing..... Link to comment Share on other sites More sharing options...
Fishnwire Posted November 28, 2011 Author Report Share Posted November 28, 2011 Those are some solid runners. Great start to the hut process. If weight is not an issue then you are doing it right in my books. I pay a tilt-n-load tow truck to move mine twice each year. I store it for free at the end of my road so I can work on it durring the summer/fall. I was thinking about a tilt and load tow truck when the time comes...how much do you pay? I'm hoping to keep it on a friend's property right on the river in the summer, so I'll only need the service one time. I wouldn't exactly say weight is not an issue...but I do want a solid, spacious hut. To be honest, those runners are going to be the beefiest part of the build...I wanted a good base, but I'm going to try and keep things a little lighter once that's done. Link to comment Share on other sites More sharing options...
Fishnwire Posted November 28, 2011 Author Report Share Posted November 28, 2011 Thats going to be a big, heavy but comfortable hut. Consider (if I guess your plans right) that you can traverse about 6" of snow before you start plowing in front of your hut when towing..... I'm thinking 2x3s (24 inch centres) and 1/4 ply for the sides, so it probably won't turn out as heavy as the runners might suggest. Once I've affixed sliders to the runners, I figure I'll have close to seven inches clearance. My chum has a big diesel pickup with a plow there, so I'll get it where it needs to go. Link to comment Share on other sites More sharing options...
Stef Posted November 28, 2011 Report Share Posted November 28, 2011 Make sure it's not wider than the plow. Also, will mean you will have to wait to get it out until the ice is strong enough for a truck, or catch it when the snow is down..... Lots of the big huts here have removable skids, fairly deep, jack the hut up, pull out sled component and then lower hut to blocks. Link to comment Share on other sites More sharing options...
gaspumper Posted November 28, 2011 Report Share Posted November 28, 2011 I'm thinking 2x3s (24 inch centres) and 1/4 ply for the sides, so it probably won't turn out as heavy as the runners might suggest. Once I've affixed sliders to the runners, I figure I'll have close to seven inches clearance. My chum has a big diesel pickup with a plow there, so I'll get it where it needs to go. If your putting 24" centers for the wall studs I don't think 1/4 plywood will be stong enough for a hut that size. Link to comment Share on other sites More sharing options...
woodenboater Posted November 28, 2011 Report Share Posted November 28, 2011 Looks like a solid hut you're building there and I look forward to updated reports. Never built one myself but I'd considering adding more radius to the front of the skis vs the angle cut. Whether or not this will help in the pull or not, a more experienced member would have to pipe in with their thoughts. It would give you a smoother transition for the teflon/uhmw/whatever you use under the runners for slip. Link to comment Share on other sites More sharing options...
Fishnwire Posted November 28, 2011 Author Report Share Posted November 28, 2011 If your putting 24" centers for the wall studs I don't think 1/4 plywood will be stong enough for a hut that size. You might be right, I'm considering 3/8 as well...I'm not there yet. Probably 2x4 studs for the corners instead of 2x3's too. Regardless, I'm going to be covering it with 2.5 or 3 inch "Plastispan" insulation on the inside, fitted tightly between the studs and glued in place. It should add some rigidity. Link to comment Share on other sites More sharing options...
Fishnwire Posted November 28, 2011 Author Report Share Posted November 28, 2011 Looks like a solid hut you're building there and I look forward to updated reports. Never built one myself but I'd considering adding more radius to the front of the skis vs the angle cut. Whether or not this will help in the pull or not, a more experienced member would have to pipe in with their thoughts. It would give you a smoother transition for the teflon/uhmw/whatever you use under the runners for slip. I was thinking about touching them up with the planner before I seal them and put the runners on...to get a more rounded profile. I'll do that first thing in the morning. Thanks. Link to comment Share on other sites More sharing options...
I'mHooked Posted November 28, 2011 Report Share Posted November 28, 2011 So, you had all night. Is the hut done yet? Let's see the pics! What's taking so long? Looks like it'll be at least a sturdy base! Link to comment Share on other sites More sharing options...
Jds63 Posted November 28, 2011 Report Share Posted November 28, 2011 great post, looking forward to seeing your progress Link to comment Share on other sites More sharing options...
GBW Posted November 28, 2011 Report Share Posted November 28, 2011 when you are done that, can you make me one just a bit smaller? It only needs to sleep one... Link to comment Share on other sites More sharing options...
Sinker Posted November 29, 2011 Report Share Posted November 29, 2011 I would try and find some metal for the exterior walls. Not only is it a lot lighter, but it lasts forever. If you can find printers tin, its usually priced fair. When I built my hut, around 15 yrs ago, that's what I used......and its still on there. Same set up as your doing, heavy duty floor, and light walls/ roof. I used 2x2 framing for the walls and roof. Its plenty strong. Ours has lasted all this time with the odd patch here and there of the tin. Find some plexi glass for the windows, and a nice little wood stove and your good to go! Did you put any thought into your floor holes when you laid out the notches for your joists?? Just askin.... S. Link to comment Share on other sites More sharing options...
Fishnwire Posted November 29, 2011 Author Report Share Posted November 29, 2011 (edited) So, you had all night. Is the hut done yet? Let's see the pics! What's taking so long? Looks like it'll be at least a sturdy base! Not quite done, but here's what happened today... - UPDATE... - I had a pretty good day today, things are taking shape. Worked on the hut for a good five hours...it's not going as fast as I'd like, but good things take time, right? I took the advice of others and rounded out my ski ends. I measured three inches from the bottom corner in both directions, drew a line connecting them and cut that off with a Skil saw. Here's one that I did to next to one I hadn't yet. Then I took the power planer to it and rounded it off a little. Next I applied wood protector...Cabot's Australian Timber Oil. The rough cut lumber soaked up a ton of the stuff and I had to work it in with the brush to get all the nooks and crannies. I didn't do the tops, bottoms, or notches because I'd be covering them with construction adhesive and wanted a clean surface. Now we were able to start cutting the floor joists. We used the miter saw and cut them all 93 inches (8 feet minus the 2x4's that would run on the ends perpendicular) then measured and marked them where they'd intersect with the runners, which we took of the bench and placed 48 inches apart (on centre.) We started inserting the joists into the runners, checking our marks and making sure it was square as we went. Things looked good so we pulled them out one at a time, spread adhesive in the notches and put them back in. Then we attached the 12 footers on the sides, spread more adhesive over the tops of the runners and joists, laid down the plywood, squared it up, and screwed it down. So that's where I'm at now. The floor needs to be flipped upside down (3 guys should have no trouble) so that the insulation can be fitted and glued. I'll decide then whether or not I'll put a plywood skin on the bottom. I'll also put some sliders on before I flip it back over. I think I'm going to go with puckboard which I've found for sale nearby. BONUS PIC!!!!! This is the dog eating the left-overs from breakfast. I'm not sure what we'll tackle tomorrow. I think it'll just be my 79 year old Father-in-law and I there, so inverting the base might not happen. If that's the case, we'll start on our stud walls and wait to finish the base when we have another couple of able bodies. We just won't be able to put them up. There's a fair amount of framing involved...a window on each of three sides and the door on the other. I'm tempted to use 2x3s instead of 2x4s but the Old Man is humming and hawing. He knows a thing or two about carpentry but has a tenancy to overbuild things. He is used to building for strength, with no regard to weight. The outside skin will be 3/8 ply...and the inside will have blue-board insulation...I probably won't bother with any kind on interior paneling. I'm planning on two foot centres...should I go with 2x4s, or could I get away with 2x3's? I'd like to hear some opinions on the matter, if people have any. More later...keep the comments and questions coming. They are really helpful. Edited November 29, 2011 by fishNwire Link to comment Share on other sites More sharing options...
Fishnwire Posted November 29, 2011 Author Report Share Posted November 29, 2011 I would try and find some metal for the exterior walls. Not only is it a lot lighter, but it lasts forever. If you can find printers tin, its usually priced fair. When I built my hut, around 15 yrs ago, that's what I used......and its still on there. Same set up as your doing, heavy duty floor, and light walls/ roof. I used 2x2 framing for the walls and roof. Its plenty strong. Ours has lasted all this time with the odd patch here and there of the tin. Find some plexi glass for the windows, and a nice little wood stove and your good to go! Did you put any thought into your floor holes when you laid out the notches for your joists?? Just askin.... S. I think printer's tin might be a little wimpy for this baby...I did consider it though. I want it to be somewhat secure and nothing but tin walls between a thief and my stuff bothers me. 2x2 framing, eh? So do you think I'd have any problem using 2x3's for my studs (with 3/8 ply) instead of the 2x4's my Father-in-law is cautioning towards? I've got real windows for it. I looked at a bunch of used ones and found exactly what I wanted...you'll see them soon I hope. I had plexi on a hut I shared with a buddy and it always frosted up. I am looking for a wood stove still. I've seen a couple that weren't bad, but the owners wanted a fortune for them. If I can't find one I like at a reasonable price I'll settle for propane until I do. The joists pretty much had to be two foot centres to line up with the plywood seams, and the runners width was dictated by the width of the trailer that will be used to transport it. The floor holes will have to go where the floor members ain't...I only want two or three, so I'm sure I'll find places for them. Link to comment Share on other sites More sharing options...
mukluk Posted November 29, 2011 Report Share Posted November 29, 2011 Well you asked for feedback;so here goes FishNwire Your making your hut waaay too heavy. Secret is to keep it as light as possible for so you can handle it without an army of guys. First heavy snowfall is going to force ice down and water up: freezing those 2x10's into new ice unless you lift it weekly. A normal ice pick won't lift that weight. You would need a fence jack or other jacking means. Another problem arises with weight If there is slush on the lake in the spring when huts have to be off and can't get the truck out there to fetch it in. I have been making huts since 1967 and not a pro builder that's for sure but the secret is to keep it as light as possible. Try 2x4's for floor joists and 2x2's for framing, printers plate with 1 inch styrofoam for walls and half inch plywood for roof and floor. Plan your hole layout etc before you put down plywood. Build a sleigh sturdy and light as possible with 10-12 inch height. Either welded 1 inch pipe or wood with black abs on the wooden runners. Take your valuables home with you when your not at the hut and leave it UNLOCKED. Thieves will smash your door in if they find it locked. Link to comment Share on other sites More sharing options...
Sinker Posted November 29, 2011 Report Share Posted November 29, 2011 2x3's with 3/8 ply will be plenty solid. Over kill if you ask me. Mine is 8x10, and we've never had a problem with the tin, or the 2x2 framing. Remember, I built it 15 years ago, and its still rock solid. Once we break it free from the ice with a bar, I can move it around with one hand. We tow it to the lake on a double skidoo trailer, with a winch to haul it on. We also put currogated plastic carboard on the inside walls, and sealed them up real good with 100mph tape and caulking. The plexiglas doesn't fog up once the stove is hot That is going to be a beast once your done with it. A heavy beast!! You should be plenty cozy though S. Link to comment Share on other sites More sharing options...
Sinker Posted November 29, 2011 Report Share Posted November 29, 2011 Also....what Mukluk said.....all true good info! S. Link to comment Share on other sites More sharing options...
Sinker Posted November 29, 2011 Report Share Posted November 29, 2011 Heres a few pics, might give you an idea. We built the walls 5ft high, and the slope of the roof is enough for a guy my height, 6'4" to stand with a hood and toque on. Its always open, with nothing it it. I bring all the gear out in a box that doubles as a bench. There is one permanent bench, and a couple fold down tables. We used to have two fold down bunks, but we never used 'em so, we took them out. They worked great though. 6 holes in the floor, but there is rarely more than 2 people fishing inside. I hardly ever do, I'd rather be in the open, but I do like to go in and warm up by the fire and get something "warm" to drink S. Link to comment Share on other sites More sharing options...
GYPSY400 Posted November 29, 2011 Report Share Posted November 29, 2011 When I built my 8x8 hut we used 2x3 on 24" centers.. Actually we ripped 2x6's in half because it's cheaper.. The outside was covered in 1/4" aspenite ( chip board) and inside was covered with the cheapest panelling I could find, as I didn't want to look at bare studs and styrofoam.. It also gives you space to put up x-rated or fishing pictures. Floors and roof are 2x4 on 16"center.. Strength doesn't seem to be an issue. You seem to be on the right track with your hut, I really like the notched out ski idea, it would tie everything together and give it strength. I recommend Ripped 2x6 walls ( so 2x3), and if your sheeting with 3/8" plywood - glued and screwed 24" stud centers will be plenty strong.. As the sheeting will add rigidity if it's glued and screwed too. I also recommend panelling the interior to give it a finished look, Which also gives you the option to paint as well. You've done a good job so far, so might as well make the inside nice to look at since that's what you see when your out there. I can't wait to see the finished product. Link to comment Share on other sites More sharing options...
cheaptackle Posted November 29, 2011 Report Share Posted November 29, 2011 Printers tin (printing plates) would be great especially if you glued them to your studs and rigid insulation - nice and firm that way. As for security - windows break easier! Besides, (sadly) anything you do other than bullet proofing will only keep out the honest thieves! Use the roofing screws with hex heads & rubber washers to attach it to the exterior. Excellent material for the roof too. If you do it on the inside as well (glue & screw to insulation & studs) it becomes a solid modular panel with strength greater than the individual components, reflects internal heat & light and leaves you a nice finish rather than bare insulation. Watch the 2 x 3's-most are finger jointed meant for light duty such as interior non load bearing partitions. You might wanna do the math and determine just how much weight you'll save by using less than 2 x 4 - on a hut that size fifty or a hundred pounds probably won't be a deal breaker. I remember a woodstove I had - it was stamped/rolled out of sheet metal, shaped like an oval drum, semi air tight and LIGHT. Used it to heat a cabin much bigger than your hut, kept it toasty all night. Took a 16" x 10" log standing up. Lasted me for several years, use every weekend fall, winter & spring as the sole heat source (some cooking too!). Michael Link to comment Share on other sites More sharing options...
Nipfisher Posted November 29, 2011 Report Share Posted November 29, 2011 Go ahead and build it big and heavy. Just go buy a farm jack "jack-all" from Canadian Tire for $80 (was on for $50 last week). I have no promblem with mine but don't leave it for more then a couple weeks without making sure it is lifted up high. I use chunks of 4x4 to hold up my hut from freezing into the ice. I have heard of people using ice blocks to hold up their huts but never tried it myself. Just have an ice cream pail at the hut and fill it with lake water and you can make al the blocks you need. I may try it this year as they do not need to be claened up at seasons end. Link to comment Share on other sites More sharing options...
GYPSY400 Posted November 29, 2011 Report Share Posted November 29, 2011 Actually my hut has one of those oval tin can wood stoves too!! Put too much wood in and it becomes a sauna! Link to comment Share on other sites More sharing options...
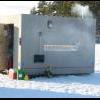
Skipper D Posted November 29, 2011 Report Share Posted November 29, 2011 (edited) ....... Here we are , check this baby out 14'x16', built it in the back yard its framed with 2x3's , 1/4"plywood on the floor in 16" centers , and closed in with wood grain 5mm sheeting , i don't ice fish so its going to be my guest bunk house out back ..... cost 2200.00 for every thing i needed to build it . Edited November 29, 2011 by Skipper " D " Link to comment Share on other sites More sharing options...


Recommended Posts
Create an account or sign in to comment
You need to be a member in order to leave a comment
Create an account
Sign up for a new account in our community. It's easy!
Register a new accountSign in
Already have an account? Sign in here.
Sign In Now