Lakeshore Posted August 1, 2008 Report Share Posted August 1, 2008 Hi everyone, good fishing. I am going up to Huntsville area next week/Magnetawan area. I want to use worm harnesses to target walleye. I have only watched others uise them, so I dont really know how to myself. I bought a few from a local tackle place. How do I rig them, how do I ensure that it gets down to the appropriate depth. If the fish are say very near bottom, how do I present the bait in such a way that the fish see it, and I dont end up constantly snagged on the bottom. Thanks for your advice. Link to comment Share on other sites More sharing options...
Grimace Posted August 1, 2008 Report Share Posted August 1, 2008 Bottom bouncers work great. You can also play the guessing game by adding snap weights. I would say go bottom bouncer. Good article here by In-Fisherman. Good Luck man. I like the 2 ounce bottom bouncers for up to 20 feet, or a little more. The general rule is an ounce for every ten feet of depth should keep good contact on the bottom. Colorado blade spinners up to about .9 mph of speed. summertime go willow leaf up to 1.8 or even 2.2. Good luck man. Bottom bouncing is a great way to cover water for walleyes in the summer. http://www.in-fisherman.com/walleye_inside...wi0407_Bouncer/ Wolf river rig works as well Link to comment Share on other sites More sharing options...
kemper Posted August 1, 2008 Report Share Posted August 1, 2008 pick up some lindy no snag weights, and a three way swivel or 2. Basically you are going to pick a length of line that will be between the weight which will be on the bottom and the worm harness. This keeps the bait right in the strike zone. I suck at explaining, but it is pretty easy, and the whole rig is trolled very slowly. -line down to three way - lindy weight off the bottom of swivel ( not too much line I use like a foot or so) - worm harness off of third loop in swivel back about a foot -troll very slowly Link to comment Share on other sites More sharing options...
Grimace Posted August 1, 2008 Report Share Posted August 1, 2008 (edited) The lindy no snagg rig is great as well. I would suggest searching alot of water out with the bottom bouncers and when you find fish stay on top of them with the lindy rig. You dont need any 3 way swivels with the lindy rig. It is a slip sinker. Good for smaller spinner set ups. For higher speeds and normal size spinner rigs I would go to a bottom bouncer. Edited August 1, 2008 by Grimace Link to comment Share on other sites More sharing options...
ChrisK Posted August 1, 2008 Report Share Posted August 1, 2008 Store bought harness I would set up on a three way swivel with the drop line weight as heavey as you need to keep in contact with bottom. You could use a home made lindy rig type bottom bouncer which consists of a slider lindy weight,bead and small swivel to which you attach a peice of your main line aprox 24 inches or more pending on your preference and then a smaller size single bait hook or equivilant......If your using worms,get yourself a worm blower and inject the worm with air so it floats.To do this correctly you must hook hook the worm once through the nose no more so when you do inject the air in the collar of the worm it will retain the air.....If your planing on using minnows with this rig you would be better off to use floating jig heads instead to keep the minnow off the bottom and in the strike zone. The whole key with using bottom bouncing rigs is to keep in contact with the bottom and keep your bait in the strike zone......Remember this and you will catch fish....... Also if there is a thermocline in the waters your fishing find it and stay above it when you drag your harnesses across the rocky inclines.....Usually up north on Canadian sheild lakes you will find the thermocline in and around 22ft of water........So fish in the 17ft range on the shoals with your harness and you should be on top of them sooner or later..... Good Luck !! Link to comment Share on other sites More sharing options...
skdds Posted August 2, 2008 Report Share Posted August 2, 2008 ...worm harness and bottom bouncer as described was how I fished last week and back in June. Worked really well. I've become a fan of the Northland holographic spinners and harness rig. It has a small float to help keep bait up in the strike zone (or so the package says). You can get them for a few bucks at Canadian Tire. Hope this helps-skdds Link to comment Share on other sites More sharing options...
McQ Posted August 2, 2008 Report Share Posted August 2, 2008 Here's a cut/paste of an article I wrote a few years ago - should help Walleye Tactics - Bottom Bouncing – Science and Application Before getting into the explanations and methods used for bottom bouncing I’d like to bring up a few points to drive home the value of using the technique and why you should include it in your arsenal of walleye tactics. My first exposure to the term “Bottom Bouncing” was in an article in the Infisherman magazine back in the late eighties. The writer was explaining this hot new innovation that tournament fishermen were using in the Dakotas and other states in the Western US. What an eye catcher, – pun intended – it was one of those “why didn’t I think of that” deals. Dan Gapen Sr. a few years earlier had developed a weight system called the Bait Walker, a wire form much similar to a big spinner bait wire with a chunk of lead on the bottom arm. These proved to be very effective for lake trout and walleye – they got your attached bait to the bottom in a controlled fashion and were much more versatile than a 3 way rig. I bet you’ve all seen them in a tackle shop somewhere. This new bottom bouncing variation though took the whole presentation method to a much higher level. By using a longer wire on the leg side of the wire form it was possible to mold the lead in the middle of the wire and the increased sensitivity to bottom structure the wire extension provided was phenomenal. This new innovative design was available in a variety of sizes that would suit a number of different fishing situations. Observation: I’m going to venture a personal observation before I move on to the technique side of bottom bouncing. It is my belief that Walleye target bait that is above them in the strike zone. I think the shape of their head especially the eye sockets prevents visible acuity of approx. 80 degrees below them. This argument probably is brought home by the number of Walleye that eat a jig on the fall. With this contention I place a lot of confidence in attracting a bite from bottom oriented fish when the presentation is with a bouncer and it also sets the stage for understanding the why about doing things right. How To: The first step in rigging for bottom bouncing is to select a 6 – 6 ½’ rod that has a fast tip and good backbone from the center to the handle. A palm sized baitcast reel with a flipping switch makes a comfortable winch for an all day session of trolling. My personal preference for line is 20/8 Fireline and I’ll point out why in a little bit. Putting It All Together: The simple procedure for determining what size bouncer to use is directly related to speed & depth. At regular trolling speeds the first 10’ can be fished with a 1 oz. bouncer and just adjust for more depth by increasing the weight by 1 oz./10 feet, you can cover the more productive zones with a selection of 1 – 3 oz. bouncers. Higher speeds can completely change the equation though, so apply a little guidance with this rule – keep your line angle from rod tip to water surface at 45 degrees. High speed (power) trolling is used out west quite often – sand and mud bottom reservoirs lend themselves very well to the high speed pursuit of walleye. It is not uncommon to watch these guys fish with 8 – 12 ozs. of weight and use speeds as high as 5 miles an hour. In this general area of Ontario and Quebec, slow speed presentations are much more in vogue. The geological makeup of the land mass with all its shield rock extending into the water systems makes for a great obstacle course when it comes to trolling a straight line at speed, in fact it usually dictates an as slow as you can go approach. Trolling speeds that work for me around here would vary from ¾ - 2 MPH. Now that we have the selection process settled, it’s time to rig up. If you are using Fireline, no let me rephrase this, regardless of the main line you choose use a Palomar knot to the bouncer. Of all the knots that are in use the Palomar provides the most security against knot breakage or slip. Getting Started: Now comes the fun part, actually getting on the water and putting this method through its paces. I’ll begin with this bit of advice – those that have the right rig and know how to back troll with it will have a huge advantage. Back trolling is an efficient and very controlled type of boat operation, it allows you to precisely work a contour line with all the ins and outs of the structure covered. You can vary speed and steering direction to suit exactly what is appearing on your sonar screen. I don’t mean to say that the folks with a windshield or console boat can’t get results I’m just saying tiller control has many advantages. A small kicker motor or electric will allow you to fish in the same way a tiller rig can, although some hull designs may be a little more difficult to finesse. The ideal hull design is a deep V that tracks the water effectively. Enough of the dry stuff, let’s get this show on the road. Step one – discovering the feel of a bouncer. Get out on the river or lake and find an edge that follows a 20’ or so contour line. Tie on a 2 oz bouncer, remember to use a Palomar knot. Don’t be concerned about using with a spinner rig or some other type of bait for the moment, this exercise is just designed to let you know what a bouncer does when it is properly contacting the bottom. Hit the flipping switch on your reel and with your thumb on the spool, slowly release line until the bouncer touches bottom. You’ll know by the thump you will feel in the rod. Now put your boat in gear, preferably in reverse (hope you have the right rig or setup). You’ll notice the line to the bouncer will take on an immediate angle. Let a bit more line out until you feel bottom again. Troll for a few hundred feet or so and occasionally raise and lower your rod tip. Do you feel the bouncer make contact with the bottom? No; then let out a bit more line until you do. When you’re sure you have contact just continue to work around the area a bit and get used to the signals that the bouncer is transmitting to the rod.. A good solid return thump indicates rock, brushed by the wire, a lesser thump is suggesting sand or gravel and a mushy feeling indicates mud. The area you are experimenting in may not hold all these bottom types so just concentrate on the current situation. This is the single best piece of advice I can relate to this subject, you’re “bouncing” bottom not dragging it. The whole purpose of this exercise is to get a feel for the bouncer being in proximity of the bottom, not directly in contact with it. The ideal distance is about 6- 9 inches off bottom. Pull your line back and let it fall forward again until you get comfortable that you’re doing it right. Did you hang the bouncer on bottom a few times, get stuck and have to yank it out of a crevice in the rocks, frustrating, EH ! The easiest way to get out of a snag is to reverse direction completely, take a reverse angle on the line and most often the bouncer will slip right out of the hang-up. Step 2 – Let’s go fishing. Are you in an area that is likely to hold fish? If so just tie on one of those store bought rigs (worm harness) you picked up just for this occasion. Actually if you have the right type of bouncer there will be a snap swivel on the business end and all you have to do is open the snap and slip the looped end of the harness on. Bait up with a crawler (on a two hook harness just pinch the nose of the crawler on the hook closest to the spinner, let the worm stretch out and put the second hook through the worms body in the area of its collar) make sure the worm is lying straight. Or nose hook a minnow under the jaw and up through the head, let the second hook trail. Let out line until the bouncer makes contact with the bottom and follow the steps as previously explained. Hey, isn’t it great to be finally fishing. There are a few elements that will tie this whole exercise into a successful method of fishing a bouncer right. Be precise in your efforts to stay in contact with the bottom, watch your boat speed and keep an eye on your sonar unit. It won’t take very long and it will all come together. Remember keep your line at a 45 degree angle MAX, any more than that and I’ll bet you’re dragging the bouncer. There are many variables that will come into play here - precision bouncing, using bouncers in conjunction with boards, styles of bouncers (yes there are a few different types that fit specialized presentations), harnesses and all the options, blade styles, bouncing cranks and a couple of others that will be of interest to you. McQ Link to comment Share on other sites More sharing options...
McQ Posted August 2, 2008 Report Share Posted August 2, 2008 (edited) Here's a bit of info that should help you with harness selection Walleye Beads & Blades Improving The Percentages Much has been written about Walleye and the bait colors that attract them. Blend that information with all the other variables such as water clarity, current flow, light penetration (time of day), scent, vibration (noise) and everything else that comes into play. Is it any wonder that trying to decide what is the hot bait going to be for today an Einstein decision. To help narrow the search for the right combinations down to a manageable few and recognizing that spinners are the high percentage bait, the single most important choice is to determine the harness colors. In-Fisherman magazine produced a very well researched and tested article a number of years ago that pointed out just what the best bait colors should be under ideal conditions. The article explained the rod and cone make-up of the walleye eye and their ability to distinguish colors. Their eyes lack yellow and blue cells which creates a color blindness situation and limits their vision to a range of reds or greens. Now if we accept the theory that the spectrum of color vision is affected by depth and start at red, orange, yellow, green, blue, etc. The question becomes what will they see as you progressively fish deeper water. Red is visible to a depth of about 15 feet in clear water and blue is identifiable in very deep situations as long as there is light penetration. In my experience the most important element of good harness design is the color of the beads, how they are arranged and what blade color complements that basic choice. This single factor is the most important when you are trying to get a walleye to eat your bait. I make this argument for a special reason, the bead color remains constant while trolling but the blade becomes a blur of color. I call it the HALO effect. If our choice is to create high percentage opportunities for our baits to encourage walleye to bite then isn t it logical to use the colors that fit the middle of the visible spectrum -orange/yellow/green and isn t it amazing that these color choices represent perch colors in their natural element. Perch are the one constant as far as forage in a walleye fishery and their range of use of the water column also duplicates the highest percentage for walleye activity. I like to use the following perch patterns chartreuse beads/orange or green blades salmon red beads/chartreuse blades chartreuse beads/orange-chartreuse striped blades. This particular color choice is also best for stained waters. Now that we have an optimum pattern set lets take a look at variables. Walleye will range from just under the surface to 50 and 60 feet deep sometimes. Depending on the forage base, whether it s perch, shiners, smelt, whitefish (ciscos) or a number of other food fish for this all-seeing predator, colors play a roll. If you can accept the fact that the beads are the most important component of the harness you can now limit your basic bead color choices smelt = blue/green, common shiners = black/white, white fish (ciscos) = black/silver. Blades in green or blue to finish the smelt emulation and black, white or purple for shiners and whitefish (ciscos). These are the basics and certainly will cover most of your fishing challenges. Next up are the special options and these are my blade color choices shallow (less than 5 feet = red, 6 to 15 feet = orange, 16 to 25 feet = green, chartreuse or blue, 26 to 40 feet = white and 41 feet + = black or purple. When fishing deeper than 20 feet I like blades that are painted on top and nickel/chrome under, the odd flash seems to trigger bites when you pump your rod. For those rare occasions when brass, gold or copper is the undertone required, I ll have some pink blades handy. In fact there is one body of water I fish for deep walleye and pink over copper will out produce any other combo by a substantial margin. If you are in the habit of tying your harnesses with quick-change clevises it makes experimenting all that much easier when you encounter those finicky bite days. All of the above combinations are set for clear water conditions, as the water becomes more turbid just adjust the depth range upwards. Early in the season I like to start out with smaller blades, sizes 2 and 3 ½, as the water warms and the forage base matures I ll move up to sizes 4 and 5. In those really dirty water or mud-line situations sometimes your best choice will be a size 7 blade and I find hammered silver to be the best choice. Speed will also dictate my selection of blade, around 1 MPH, Colorado is my choice, 1 to 2 MPH = Indiana and over 2 MPH the selection then are Willows. There are quite a few varieties of blades available today other than those already mentioned and there are times when they can be deadly. Remember that this short story is based on high percentage baits, that doesn t mean you shouldn t experiment on your own.. These combinations are just what I have discovered work well for me and the waters I fish on. A few years back I discovered a very special spinner that is available in many colors. It is a spin & glow and when baited with a leech or worm can be deadly. They also work well for speckled trout. The one thing I would recommend any of you to try, is to snorkel behind a harness and look at what the fish sees. Just go to a beach and have a buddy cast and retrieve a spinner harness by you.. I know the observations will reveal some basic truths about spinners and the validity of the choices I have made to improve my catch ratio and hopefully do the same for you. McQ Edited August 2, 2008 by McQ Link to comment Share on other sites More sharing options...
solopaddler Posted August 2, 2008 Report Share Posted August 2, 2008 Excellent article by McQ! I'll add to that with an old article by Phil Rolfe: Bottom Bouncing As I Know It By Phil Rolfe Rods and Reels From my experience in fishing Canada professionally for over a decade, there is one rod and reel set up that works better than any of the others-----------hands down. Now, there are people who use some other types and use them well. But to my way of thinking, they have to work harder to accomplish the same thing. The best setup is a baitcasting rod and reel, far and away the best. Not just any baitcasting setup, either. First the reel, I prefer a reel with a flipping switch. For those of you who are not familiar with this type, a flipping switch will allow you to meter out line by engaging the thumb bar and thumbing out the line, when bottom contact has been made, release the thumb bar and the reel automatically engages in the static position----or simply put the spool is locked up. This allows for one hand operation, a plus when bouncing all day. It helps alleviate the fatigue factor. The drag should be set at medium strong tension, you can pull out line, but not easily. Close enough. For rods, I used a St. Croix PC 66M. This rod is 6’6” with medium action and a fast tip. Most of the summer I am pulling two ounces of lead because the depths worked are in the 20' range. That is the home of summer walleye. Sure you may find them deeper, or shallower, but they spend most of their time in that range. Remember not all medium rod actions are created equal. This rod has fast tip and plenty of backbone. If you are going to try another rod, hang a two ounce bouncer off the tip and shake the rod up and down. It will be obvious if the rod is two whippy--------the biggest danger. You want to see a little bit of bend, not a bow in the rod. The drag of the spinner and the line will add further weight to the tip. For line, I used ten pound Trilene XT. It was tough and it stood up under abrasive conditions. I tried but quickly abandoned the no stretch hi tech lines. With those lines, there is no give, so the rod has to handle all the shock. A lot of ripped lips and lost fish. Keep in mind, I fished in stained waters. I feel it necessary to say that I know a couple of pretty good anglers who use a spinning rod and reel to bounce with. Now, I plainly feel that this is harder to operate then the bait casting setup. The rod should have a fast tip and enough backbone to handle the two ounces. The medium sized spinning reels work good, don't go to small otherwise you won't be able to put enough line on the reel and will be quickly adding new line. The best way to let line out is to definitely not let the rig free fall. All this will accomplish is to put twist in the line and create a jumbo mess between the line and the rig. Line needs to be metered out. Here's how. Let four or five loops come out from the reel and then interject your finger against the spool. This will stop the descent, pause for a second, and then do the same thing until you find the bottom. A controlled descent is the only way. Even though this rig goes against my grain, it is workable, and for those who only have one type of rod, it can be done. Bouncers, Snells and Blades Many geographic areas in North America require different methods for bouncing. For example, Laurel River Lake in eastern Kentucky is a highland reservoir with great depths exceeding 200 feet. It's shoreline was timber which was cut off at approximately the same height----two feet. You need to run above those stumps or you will be snagged all the time. Spending more time getting loose or replacing tackle then fishing is what you will get. I am going to discuss is bouncing on the shield. Most of the lakes in northwestern Ontario are rocky bottoms generally and if you drag a bouncer you are going to get hung up. Or if pull a snell that is too long and consequently rides too low, same thing will happen. I prefer the Lite Bite setup by Quick Change. I like this bouncer because the line runs through a weight snap and allows you to feed line out on lazy fish. Similar to the way line goes through a Lindy Rig weight. The bouncer is straightforward with a single wire strand with lead half way down. I have gone weeks without a snag and bounced everyday. It's all in the technique (coming up). I carry weights from 1/2 oz. to 2oz. Used to carry 3 oz., but they stopped making them. Good thing too, they were killing me. Mostly I used 2 oz.. That was mainly because I fished most of the year in the 20' range. Exceptions, were early and some in the middle of the summer when the fish were ultra shallow and I used lighter weights. For snells, years of experimentation have shown me that something in the 30" range works best in all but the clearest of waters, which most of northwestern Ontario is stained. The bouncing style is I use is to run the bouncer a foot off the bottom and then bounce it on the bottom to a cadence. With a snell of thirty inches which always rides lower than the bouncer; it is right in the fish zone. I prefer snells with either two or three hooks. Hooks placed about 2.5 inches apart seem to hook up good. Of course, a Quick Change clevis is mandatory cause I change blades often, always searching for the hot blade. Snell test is 14 pounds, but can be vary to your pleasure and always high quality mono, never Spider Wire. For beads, I use 4 or 5mm in a variety of colors. I really didn’t see any difference in performance with bead colors. Actually, I liked to use a stacker bead with one bead ahead of it next to the clevis. It is easy to assemble and works just as well. For blades I carry a mixture of Colorado’s, Indianas, and willows---with equal amounts of each. I carried small, medium (most), and large sizes. Hammered colors worked best for me in nickel, brass, gold, and copper. Plus, a mixture of the other colors. Have a few darks for the dark days. Generally, I used Colorado’s early in the season until the fish got warmed up and really hitting. Colorado’s are like the knuckle balls of blades. As the waters warmed, I would speed up and use the slider-----------the Indiana. Then during the warmest water of the season, I would run the fast ball---the willows. I also carried some specialty blades, but generally someone would have to give me them to try; I like to keep things simple. I found that many blades were designed to catch the fisherman rather than the fish. But that's the nature of the fishing business. The fish don't really care how much tackle you have. However it is ok to experiment, just don’t get carried away with it. Do keep what you do have neatly boxed, it catches more fish. Coming up will be bouncing techniques. Bouncing is really a simple game, there is just a few absolute techniques and we will cover them, and after one trip to Canada, you will have it down. Your fishing will never be the same, I can guarantee you that your fishing catching confidence will grow tremendously. Bottom Bouncing----The Technique To begin with, I use one ounce of bouncer weight for every ten feet of depth that I am fishing. Unless, there are special circumstances, such as running extra fast, then I will run heavier weights; sometimes two 2 ouncers attached to the weight snap. You can attach more than one bouncer to a weight snap if you need to run heavier set ups. Let's say for discussion purposes, that we have marked fish in twenty feet, which is a depth range that I fished most often, especially after the water warmed up to near year‘s maximum. I would have two ounce bouncers on and be running a willow leaf. The fish will almost knock the rod out of your hands. Wait a second, I want to make an important point here. I want to have approximately a 40 degree line angle going into the water. Gives the best hook set and best bottom control. To little line angle and you don't get a good hook set, and to much angle and you don't get good bottom control, but a lot of snags. Neither is desirable. What determines line angle? Bouncer weight and boat speed. Ok, with that said, let's put on nice big crawler and get going. That's all I ever use, a big fat crawler, that's all I ever needed to use. It's up to you, leeches and minnow will work, but I like the crawler. The new plastic worms are doing ok. I doubt however if they are up to the standards of a fresh healthy crawler, but that is not the point here. In letting the line out, I press the thumb bar and while keeping my thumb on the spool to control rate of decent, I meter out the line until the rig makes content with the bottom. Another key point here, if you let the rig free fall, you will get line twist and possibly a big mess besides and it some cases the rig will be rendered useless. So let her out steady slow. Ok, we are on the bottom. Engage the reel, and lift up the rod tip up a foot. In a couple of seconds bounce the bottom. If you don't feel the bottom, let out more line, not to much just enough to find the bottom. Engage the reel again and lift the rod tip up foot. Then bounce the bottom to a cadence, don’t drag it. The snell will ride lower then the weight but will be in the prime fish zone but above the snags. Once you feel that tell tale tug, drop your rod tip back towards the fish and then slam it forward----driving the hooks home. That is really all there is to it. If you get snagged which should happen infrequently, it is best to go back directly over the snag and rip straight up, almost every one will come out. If you try to rip it out from an angle, you will seldom get it loose. So take the time. If I go through a bunch of fish, and don't have the right action, I am changing blades, and sometimes styles and sometimes------------both. Don't hesitate to change blades. I would always start with something in hammered finish. I have more confidence in them. I know there are guys who just jig and are die hard about it. I will tell you this with no uncertainty whatsoever. A good bouncer guy will catch more fish then the jig guy day in and day out. Actually the best setup is using the bouncer to find them, then if they are grouped, then jig them, otherwise stay with the bouncer. It is the best search tool on the Canadian Shield to find and catch walleye. It is easy to learn, and can make an average or below average jigger into a great fisherman. So give it a try. You won’t need to hire guides, you will find them on your own fish, and I assure you that you will become a fish catching machine. Boat Control Although, I prefer to bounce from the bow because of better control options, it also is possible to back troll and drift with bouncers as well. Control is best accomplished using the latter two with the aid of a drift sock. But first something about the advantages of using a bow mount, the method I feel that is vastly superior to the other two. First of all, there is absolute control and precision with a bow mount that the other two methods lack. By going into the wind, you can control your speed precisely because the wind is helping you by putting a force on the bow. Going downwind, you are at the mercy of the intensity of the wind. It really boils down to wind or no wind. If it is light or non existent it does not matter which way you go. A bow mount, if cable driven, allows you precise depth control, you can stay right on your contour line constantly------- depending on your skills. The more you do it, the better you get. I used the Pinpoint system which would automatically follow a preset contour. Then again, I fished about 150 days with very little time off each season and it really aided in the fatigue factor as well as better and easier boat control. Drifting with a drift sock down wind is a good method, although not as precise as the bow mount. You can use the main motor to move you in and out to stay on the proper depth. Tie the drift sock to the middle of the boat which will make it perpendicular to the direction of the wind, in other words you will be drifting sideways. In some windy conditions, you may need two drift socks. It works, but it is a bit more cumbersome. The worst of all boat control presentation for bouncing is back trolling--------also the wettest and most uncomfortable. You are working much harder than you need to here. Of course back trolling has pretty much gone by the wayside as technology has advanced bow mounts to such a large degree of superiority. Time to put a unit on the bow if you are running from the rear. A good bow mount setup needs a depth finder at the bow, using a swivel from the one on the dash is a less than ideal arrangement and leads to poor boat control. If you are running one of those, pop for a few bucks and get set up correctly. Bouncing is a simple game, but there are some absolutes that can not be ignored. Boat control and boat setup are a few of those. If you see a boat without a bow mount, you would be 98% correct in assuming that person utilizes bouncing very infrequently. I find this amazing that bouncing has taken such a bad rap among certain fisherman, when the reality is that it is the best search weapon yet for finding walleye. Once the fish is found, then it is up to you which method will work the best. By all means bring out the jigs, lindy rigs, or slip bobbers. Bouncing--A Little Trick As the water temperatures rise to some of the highest levels of the year, the fish’s metabolism is really cranking and they will chase baits to a much greater degree than any other time. At this time you can really slam some nice fish and do it quickly. I like to add two 2 ounce bouncers to my weight snap ( who ever said you can only run one weight) and run a willow leaf blade. Here we are not going to worry to much about following contour but more fittingly described as being in a depth range. The fish are occupying more of the water column because the temperature is more equally distributed. Some will be deep, some shallow and some in between. I like to run this method in about ten feet of water. You are probably wondering about why so much weight. Well, we are going to crank up the bow mount to 75% power and let her fly. Remember that speed and weight determine line angle. We want to be able to feel the bottom and we don’t want to get hung up by having to much line angle. The fish will really wack this one and you can nail some real brutes. I remember one pass down of about two hundred yards around Eagle Island on the Woods when we nailed four fish over 25 inches. When they hit this presentation, they are serious. Speed or the lack of it can provoke strikes. In the summer, fast is better as a rule. The key here is speed, being relatively shallow (especially in stained water), and not worrying about the exact depth. You will be amazed on the amount of territory you can cover here. Bouncing---Another Trick I like to target the fish that have laterally suspended off a hump. A fish has two choices when moving off a hump, move down or move out. I think most move out, rather than down. However most fisherman move down. I am speaking of the deep water humps here, something in the twenty foot range for example. Anyway, when you are bouncing a hump or a shoreline and you come to the end or the drop off to deep water, just hold your bouncer at the same level you did when bouncing the hump and tool around out over deep water. You will be amazed at the fish you will catch suspended, they usually run fairly good size and hit like a ton of bricks. So just run right off the edge and hold the bouncer at the same level as the hump. Make a figure eight type of maneuver with your boat, and then go back on the hump and repeat. It is good to mark the edge of the drop off with a buoy. Bouncing In The Spring Spring time is a time of change from hard water to coldwater to warmer water. At first when the water is very cold, just after ice out, the fish are deep because it is warmer and more consistent. However, as water warms as opener arrives, the eyes have moved shallow to eat, spawn, rest, and eat again Now in the early morning as the water has been cooling, they may be a little deeper, but as the sun warms it up they will be shallower. What is shallow, I consider it to be around ten feet to as little as six inches. I bounced a lot in the spring, it was the best way to find constantly moving fish. Fish will hold to a spot as long as there is food. However, once that wanes, they are on the move again. The best way to find them quickly is to pull a bouncer. I use Colorado’s (medium to small) for this. For weight, something in the 1 oz range works nice. Fish the flats and points and hit the bays, the shorelines between bays and key on fish holding spots. The main shorelines are the ticket as the off shore humps are not going yet. That happens a little later on. Once fish are found, you can crank them or jig them--------or keep bouncing. This works so much better than randomly checking areas with a jig which is way to slow. However, if you have known fish magnets like waterfalls or fast moving current, then you have more options. I use crawlers as I do for every other season as well. However, the bait is a preference thing. They all work good. Leeches can be iffy in the early going though. Step on them, to make them run straight in the cold water. Minnows are great, use one hook snells with a stinger. Late spring in Canada is June, which is summer in the lower 48. However, it still can be brisk up there. Fish start along the shorelines and move to the center of the lake as the water warms up. So the first humps to get action are the ones closest to the main shorelines. Check these as the shoreline action begins to tail off. The water should be in the mid sixty degree range as this really starts to hum. Bouncing In The Summer As the water warms up even more, and the water temp becomes more equal from surface down into the depths, the fish have more options for food and comfort, and safety of course. It is this time of year that the fish have moved to their summer haunts. They are now mostly gone from the main lake shorelines and utilizing the off shore humps, flats and island shorelines. However, a few will still be along the main lake shorelines and bays. I find the 20+_ depths to be quite important at this time of year. Not to say that some won't be shallower, but the bulk of the population will be deeper most of the time. However, it depends on the forage base. Walleyes will be feeding on whatever is easiest, so if they are keying on shallow baitfish, then they will be shallow. This is more an exception then a rule, however. Some years, a shallow bite will be stronger then in other years, and some years it seems that they are all shallow. You can actually site fish them with cranks or light jigs. But once again, I think this is the exception. I like to work main lake shorelines of off shore islands. Especially the ones with round rock about basketball size as opposed to hard granite shorelines. These round rock shorelines give the forage places to hide and the eyes are there looking for them. With a bouncer, you can quickly cover ground and locate the active fish. Then work that area. Speed can be increased as the fish are now willing to chase a bait, and it will trigger inactive fish in many cases. Speed is now more productive then going slow. Slow is for early season and late fall. Flats--------Walleye’s Secret Structure One of the most common areas that are almost completely overlooked by anglers are flats. I remember one of my best spots on the woods, was a long flat which was surrounded by deepwater. It was snag free and appeared to be featureless. Yet from the beginning of summer until fall, this spot held an abundance of walleyes. For those who have fished with me, it was Bird %$#$ Island, it was bald and held a lot of gulls. Anyway this spot never let us down. There were always fish on it. Flats are never totally devoid of structure, they just look that way. But there are little depressions, troughs, a boulder here and there, maybe a clump of weeds. Usually soft bottom, they also hold all kinds of bugs and worms which the eyes will root out. Flats are easy to find, they are the areas on the map where the break lines are spread quite a bit a part as compared to the sharp breaks where the break lines are close together. I preferred flats in the 15-20 foot range. I will guarantee that once you find one, you will have it all to yourself. How is a jig guy going to cover a flat. He's not. You may think I am bias in favor of bouncing. You are right, it's the best search tool for walleyes. However, I do believe that jigs, spinner rigs, and cranks all play apart in obtaining the best success. There is a time for each. I think a fisherman who only jigs is only playing with half the cards and will be consistently out fished by a versatile angler who uses all methods. Bouncing Doesn’t Work ????? Bottom bouncing does not work well when you are fishing very shallow or need a horizontal presentation. You are better off fishing with jigs or crank baits in those circumstances. Jigging can work better when the fish are tightly grouped on a piece of structure, like an inside turn for example. Of course, the bouncer is probably what found them for you to begin with. Bouncing is not the way to go on very small humps, however very small humps don't hold many fish anyhow. And finally, I would jig or crank bait, just below waterfalls or rapids in wash out areas or eddies. Forget The Naysayers Years ago, many years ago, I started bouncing while working for a fishing travel education company. I was the only guy bouncing and got a lot of lip for it. I was told that bouncing was about as exciting as watching ice melt. However, catching fish is very exciting----------and bouncing allowed me to do that. I also observed guys that couldn’t catch a cold jigging, become very good anglers after learning to bounce. Their fishing self images began to rise and they now had the arsenal to find spots on their own and many times out fish our so called pros. It was very rewarding and made a tremendous difference in my fishing career. I really feel that anglers that utilize all the methods and the right one for a given situation will out produce those guys who are set in there ways. Be versatile, keep it simple, and have fun. Link to comment Share on other sites More sharing options...
solopaddler Posted August 2, 2008 Report Share Posted August 2, 2008 Also if there is a thermocline in the waters your fishing find it and stay above it when you drag your harnesses across the rocky inclines.....Usually up north on Canadian sheild lakes you will find the thermocline in and around 22ft of water........So fish in the 17ft range on the shoals with your harness and you should be on top of them sooner or later..... Good Luck !! That's a very unusual and interesting statement. I've always found that in shield lakes 17-22' was a magic depth to fish at when targetting active fish in the summer. I believe it's more a factor of the tea stained water than anything else. In my lake the thermocline is maybe down 10'. I've got a couple of very deep basins pushing 70' as well. In August things start to slow down somewhat and the walleye are a bit harder to locate and find. Many times in early morning as the sun's rising or in the afternoon, the only way to catch numbers of more quality fish is to fish the deep edges of the SHADY side of various shoals. For me this entails crawling along DEAD slow with the electric and a live bait rig of some kind, following the contours of the shoal and fishing in at least 35-40' of water. Also, I've stumbled upon a pattern for big fish that basically involves trolling deep (35-45') sand flats very quickly with a heavy bouncer, spinner rig and worm. Lots of MUCH larger fish in the 25-30" class are caught. Bigger than what is normally caught on my lake in the dog days of summer for sure. My advice for somewhat pressured summertime walleye? Fish the traditional shoals, saddles and points early morning and dusk. During the day think outside the box a bit and look deeper. They're down there and you'll likely have them all to yourself . Link to comment Share on other sites More sharing options...
Roy Posted August 2, 2008 Report Share Posted August 2, 2008 Lakeshore, you seem to have hit the motherlode with your question. You've gotten very insightful information from some of the top walleye people on this board. Anyone interested in upping their walleye catch rates should give these methods an honest try. Thanks all for the great advice and a special thanks to Bill (McQ) for taking the time to post his goldmine of an article. Link to comment Share on other sites More sharing options...
brickNblock Posted August 2, 2008 Report Share Posted August 2, 2008 What an exellent, informative read McQ. Some NEW info and some OLD but a great report just the same. Link to comment Share on other sites More sharing options...
brickNblock Posted August 2, 2008 Report Share Posted August 2, 2008 Thanks for that article solo..... Almost missed it after replying to McQ's 2 great reads like that back-back are a rare thing these days.... Im heading into my shop right now to check out my blade and clevis supplies... Thanks guys.... Link to comment Share on other sites More sharing options...
Bernie Posted August 2, 2008 Report Share Posted August 2, 2008 Lots of interesting information here. Fishing all my life on Nipissing I can't say what works well on other lakes. But here I have fished with many fisherman and they all seem to have an idea of what works best. But I stick to what works well for me and I have made quite a few converts to what I use. Medium action rod, fast tip with a spincast and Fireline (still need to give the powerpro a try) with a homemade jig, trailing hook with a worm. The reason I like this setup is I anchor at a reef close to where the pickerel may be. I start to cast around the circumference of the boat until I catch one and target that area. If the hit is at the end of my cast I will try to let out more anchor rope to get a little closer. Try to anchor a long way upwind to allow movement in your boat by tying the anchor rope at different positions on your boat. Jigs are from a Cabelas Wobble jig mold and are usually chartreuse, pink, orange or plain white. The shape and design of these are less apt to snag in the crags of the rock below. But if you don't snag once in a while you probably won't catch them either. The spincast works better for casting distance with a light jig. Often the pickerel bite so light guys with mono don't feel the hit. Braided line takes some getting used to but my opinion is heads and tails ahead better. In the article by Phil Rolfe he stated "I tried but quickly abandoned the no stretch hi tech lines. With those lines, there is no give, so the rod has to handle all the shock." My thought was maybe he should not have quickly abandoned it. I agree with solopaddler on fishing deeper through the middle of day. My wife likes the sunshine so a lot of my fishing time is 10am to 2pm. Believe me they do bite well at these times too. Just thought I would share my experience here. Link to comment Share on other sites More sharing options...
Lakeshore Posted August 2, 2008 Author Report Share Posted August 2, 2008 WOW guys, thanks to all who responded, especially solopaddler and McQ!! What a incredible wealth of knowledge. I have some reading to do that is for sure. Who knew that a simple request would turn into something that all of us on the board could use. No wonder I love this place. I am sure to try this next week on my trip. Hopefully I can catch fish and make use of all of this in a constructive manner. I will create a report when I get back and let everyone know how I did. Thanks Again..... Link to comment Share on other sites More sharing options...
McQ Posted August 2, 2008 Report Share Posted August 2, 2008 (edited) Thanks lakeshore - your comment is exactly why I continue to be encouraged to write. After 50+ years of chasing walleye a few ideas, tricks & tips have crossed the gunnels of my boats and it will always be a pleasure to share them. It's also the main reason that I run my summer fishing schools as an informative and sharing way to accumulate knowledge. Looking forward to reading your report. Edited August 2, 2008 by McQ Link to comment Share on other sites More sharing options...
Almontefisher Posted August 3, 2008 Report Share Posted August 3, 2008 Im heading into my shop right now to check out my blade and clevis supplies... Ah Clevis..This makes everything clearer...that is why every time I went to this tackle shop and asked for the Cletus the shop owner kept saying thats me ...It Clevis not Cletus....lol Sorry love that name and always think of this happeneing to someone in the deep south. Link to comment Share on other sites More sharing options...
Dabluz Posted August 3, 2008 Report Share Posted August 3, 2008 (edited) Here is a trick for those small boat operators who do not have an expensive bowmount electric motor. Take a transom mount electric motor and reverse the direction of the motor by either removing the screws at the base of the shaft and turning the motor 180 degrees or at the top of the assembly (control housing). The reason for turning the motor 180 degrees is the fact that an electric motor is much more efficient when in forward gear. On top of that, there are usually more forward gears than reverse gears. Now, you can install your electric motor at the bow and the handle of the electric motor will be within easy reach. A bracket at the bow of a small boat is easy to make. As for what kind of line to use, I would not use Fireline over 10 lbs because 10 lb test Fireline breaks at about 20 lbs. It's not true that 20 lb test Fireline is the same size as 8 lb test mono. Just look at the stuff....it's at least equal in size to 14 lb test mono. I prefer a smaller diameter Fireline due to the fact that it cuts through the water much better. I use 6 lb test Fireline most of the time when bottom bouncing. I make my own worm harnesses because I make nicer and better ones than those that sell in the stores. Beads.....take a look at the beads that Walmart sells in the sewing department. There are a series of 5 mm beads that are perfect for worm harnesses. They look like cat's eyes and come in various colours (blue, green, yellow, red and orange). To the uninitiated eye, they look quite non descript but put them in a dark closet, open the closet door a tiny bit and shine a weak flashlight into the closet....those beads light up like they eyes of a cat or fox as they cross the road at night. The beads don't cost much more than peanuts. Use high quality hooks (Gamakatsu, VMC etc.). Stay away from fluorocarbon line when making your worm harnesses. It's not true that this stuff is more abrasion resistant than mono and it is not true that it is less elastic than mono. Use a good quality clear monofilament. Not flourescent clear but just clear. Learn how to make a snell knot. Don't believe me about mono and fluorocarbon....read these 2 sites carefully. http://www.sportfishingmag.com/article.jsp...;categoryID=262 http://www.sportfishingmag.com/techniques/...ngth-53412.html Unfortunately, the article on the 20 lb line abrasion test has been modified. The original article was about 6 pages long and showed much more detail, statistics and test results. If you want to pump air into your worms, find a diabetic who has to use a syringe. They use a very very fine syringe that is perfect for pumping air into worms. The hole is so small, the air does not leak out. Another way to make your worm harness stay off the bottom is to slip a piece of styrofoam on the line. One of those small pieces of styrofoam that is often used in packaging. However the best ones to use are the ones sold for worm harnesses or those spinning type styrofoams like in one of the above photos. You can even do a lot of the steering with just your knee if you are standing up. If you must, you can easily add an extension to the motor handle. Put most of your gear at the rear of the boat in order to keep the front of the boat light and more responsive. In any event, you will have much more boat control than when back trolling. Edited August 3, 2008 by Dabluz Link to comment Share on other sites More sharing options...
Mark Kulik Posted August 3, 2008 Report Share Posted August 3, 2008 Wow -talk about info! good job, the harness is an awesome tool-I like to use the electric motor with a bottom bouncer - works everywhere ! was o Erie a while ago with Bob Devine and I was amazed at the size of open-water walleye we caught on them! Link to comment Share on other sites More sharing options...
wallyboss Posted August 3, 2008 Report Share Posted August 3, 2008 Worm harnesses and bottom bouncers are most walleye fishermen Go-to setup. they are to me . Link to comment Share on other sites More sharing options...
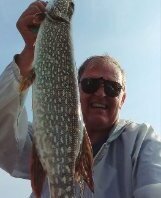
linweir Posted August 3, 2008 Report Share Posted August 3, 2008 Thanx for sharing. Muskie love them too. I boated a few ski when I used worm harness to fish walleye this year. Link to comment Share on other sites More sharing options...
McQ Posted August 5, 2008 Report Share Posted August 5, 2008 Harnesses have produced some major catches for me also from pike and smallmouth not to leave out crappie, perch, drum (sheepshead), the odd muskie too, catfish, sturgeon (must happen when you stall the bouncer on a turn). My oddest catch was an 8' american eel - now that was some fun (can't really describe the interior of the boat after that deal - "mess" just doesn't cover it. Link to comment Share on other sites More sharing options...
danbo Posted August 5, 2008 Report Share Posted August 5, 2008 (edited) Big bait=big fish! Edited August 5, 2008 by danbo Link to comment Share on other sites More sharing options...
McQ Posted August 5, 2008 Report Share Posted August 5, 2008 Imagine the bare patches on that guys lawn - but then again what a Muskie bait. Link to comment Share on other sites More sharing options...
Dabluz Posted August 5, 2008 Report Share Posted August 5, 2008 With a bait that big, no need to go fishing....you eat the bait. Link to comment Share on other sites More sharing options...


Recommended Posts
Create an account or sign in to comment
You need to be a member in order to leave a comment
Create an account
Sign up for a new account in our community. It's easy!
Register a new accountSign in
Already have an account? Sign in here.
Sign In Now